|
|
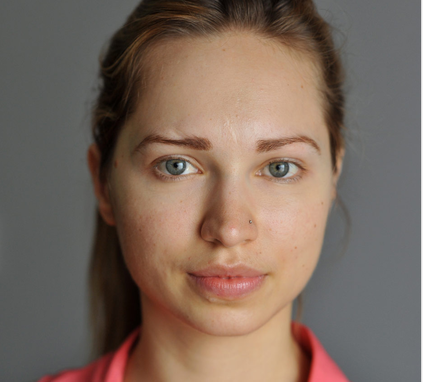
BEFORE |
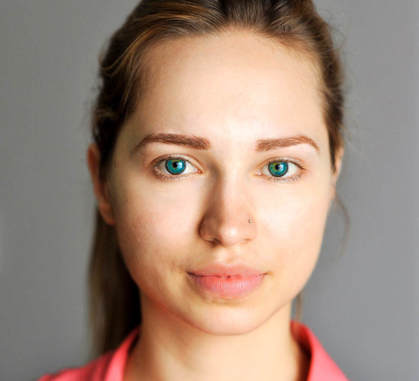
AFTER |
These are the before and after pictures of this lady from one of the stock photos for projects. I made sure to really brighten up the photo by adjusting the highlights and whites because the original photo is quite dark and dull-looking, and I dodged some light onto her face, specifically on the chin, cheeks, lips, nose, and forehead where the natural light shines. In contrast to that, I balanced the shadows and blacks in accordance to the highlights and whites to make sure that the contrast between the highlights and shadows in the photo are prominent. I also, I darkened up her lashes, and the outer part of her eyes along with the pupil. Some other changes I made to her face are her eyebrows, her eye colour, and her lips. I filled in her eyebrows using a cloning tool, I changed the colour nof her eyes to a blue-green, and I softened her lips.
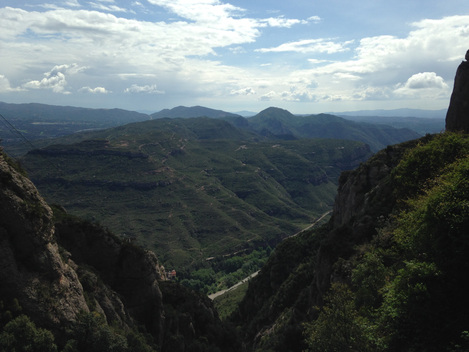
BEFORE |
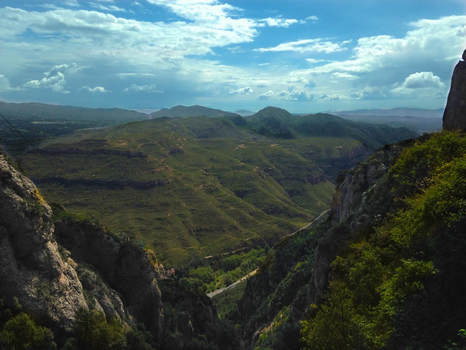
AFTER |
Starting off on the foreground, I increasing the saturation of the shrubs on the rocks to make the colour more prominent. I also increased the highlight and clarity of the lighter-coloured chunk of rock over by the left to make it stand out more. And I increased the exposure of the rest of the dark rocks to make it appear more.
Moving onto the green mountain which is the middle ground. Like the shrubs on the foreground, I also increased the saturation of this mountain to add more vibrancy to the colour, and I fixed it's temperature to make it less of a dull green.
For the background, which are the mountains at the very back, I made sure to make the colour the most dark so I maneuvered around with the shadows and lowered it down to the lowest setting along with the highlights. And for the sky, I fixed it's saturation to make it more blue. Along with that, I lowered down it's contrast, shadows, and clarity.
